Learn how to set up a Facebook Cover Video to make it fit perfectly in the cover area without losing important visual information.
A few months ago you may have noticed that Facebook started slowly rolling out the video cover images feature for Facebook pages.
We’ve already written an article about why you should take advantage of it and how to use the feature here.
If you tested it, you may have experienced this pain: “My video gets cut off right where I had important text or images to be shown!”
Don’t worry, in this short article I will show you step by step how easy it is to prepare and optimize the video you’ve created with the Wideo editor.
Specifically so that it fits perfectly in the cover video area without any undesired cropping.
Basically, we’ve created a template with visual guides for you to use so that you know where to add and animate objects in order to make them visible in Facebook cover format.
Something like this:
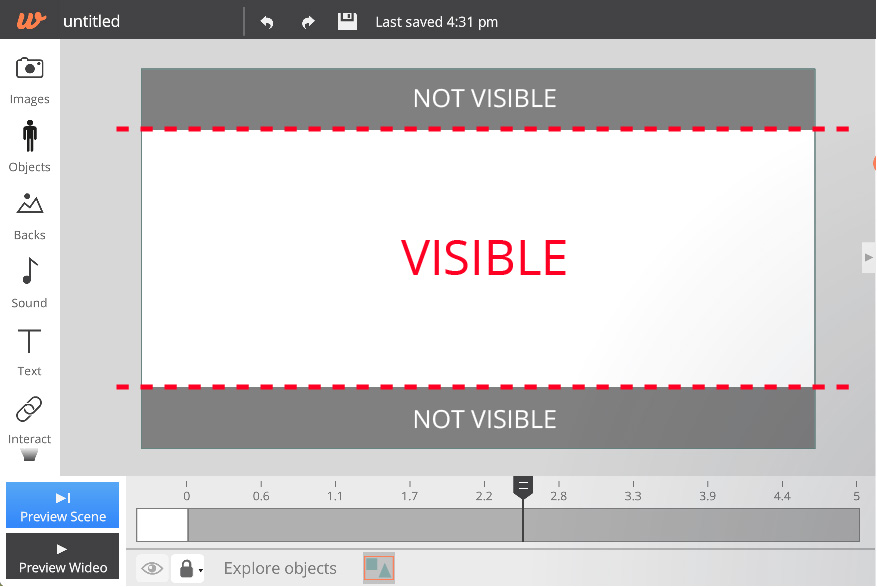
The white box represents the dimensions of Facebook’s Cover Video.
There are two ways to use this guide template, depending on whether you’re creating a video from scratch, or if you’re editing a template or adapting an existing video.
If you’re creating a video from scratch
1 Create the video with guides
In this case you can start creating your video from within the template itself.
Just click here and the editor will open with the guides already placed in your first scene (the video will also be added to your profile automatically).
All you have to do is to start designing and animating, placing every object that you want to be visible inside the white rectangle.
2 Design with the guides on top
You will always want to keep the grey guides on top of the composition.
To do this, select the “send backwards” option for each object you add to the scene.
To arrange your elements behind the guides, select the object (or objects), click the big triangle in the object menu, and from the drop down list select “arrange“.
You can also arrange the objects’ order by right clicking on the selected object and choosing one of the options on the “arrange” button.
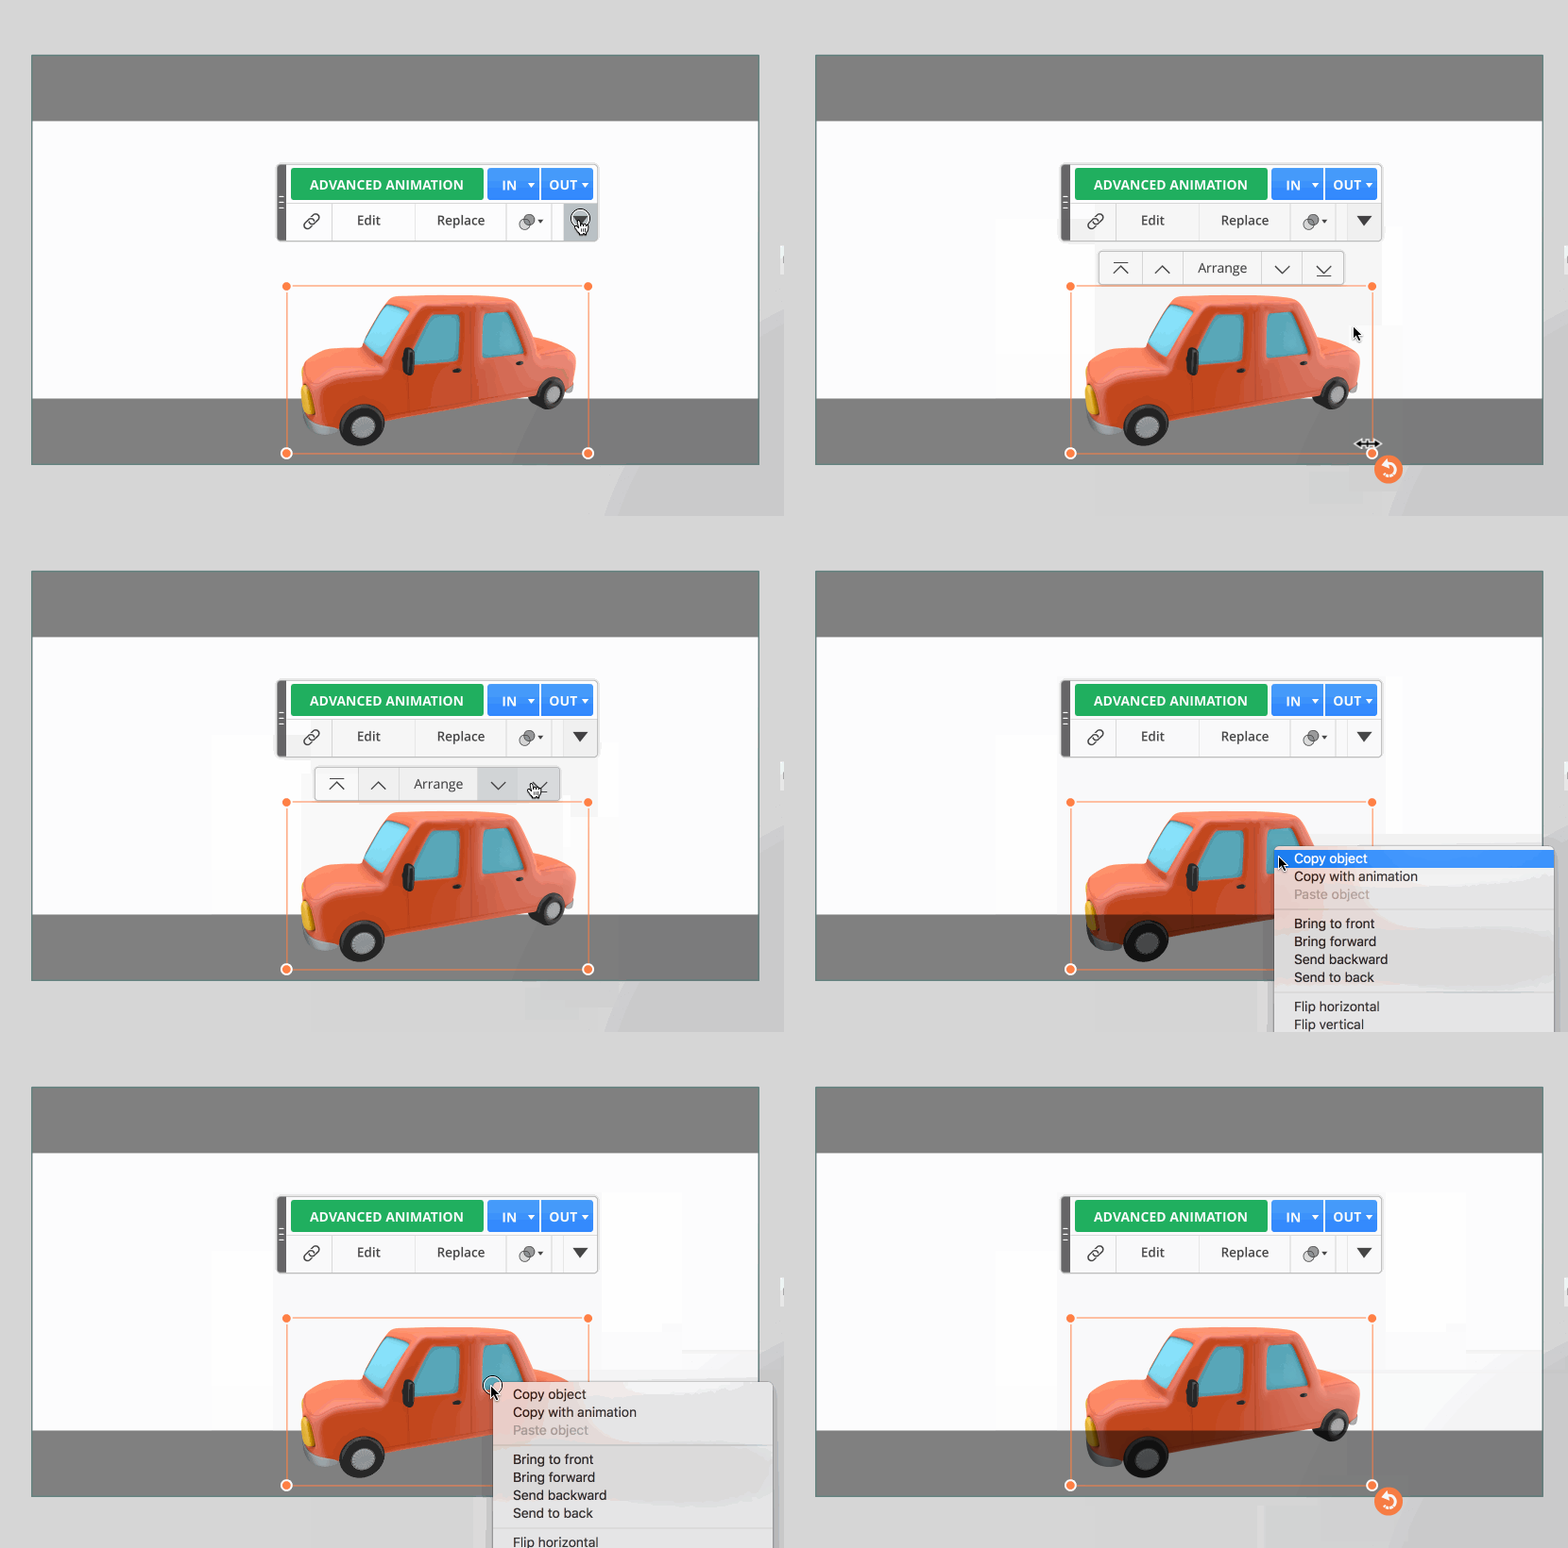
The single arrow brings the object forwards or backwards one level at a time.

And the other arrow sends it straight to the back or the front.

3 Clone scenes to save time
In Wideo, when you duplicate a scene, the new one will contain the same objects that are found in the original.
So, clone scenes that already have the gray guides in order to start editing a new one that’s ready to go.
4 Remove guides
By default, the guides are locked so that you don’t have to worry about clicking them on accident.
Once you finish the video, you can unlock and delete those guides.
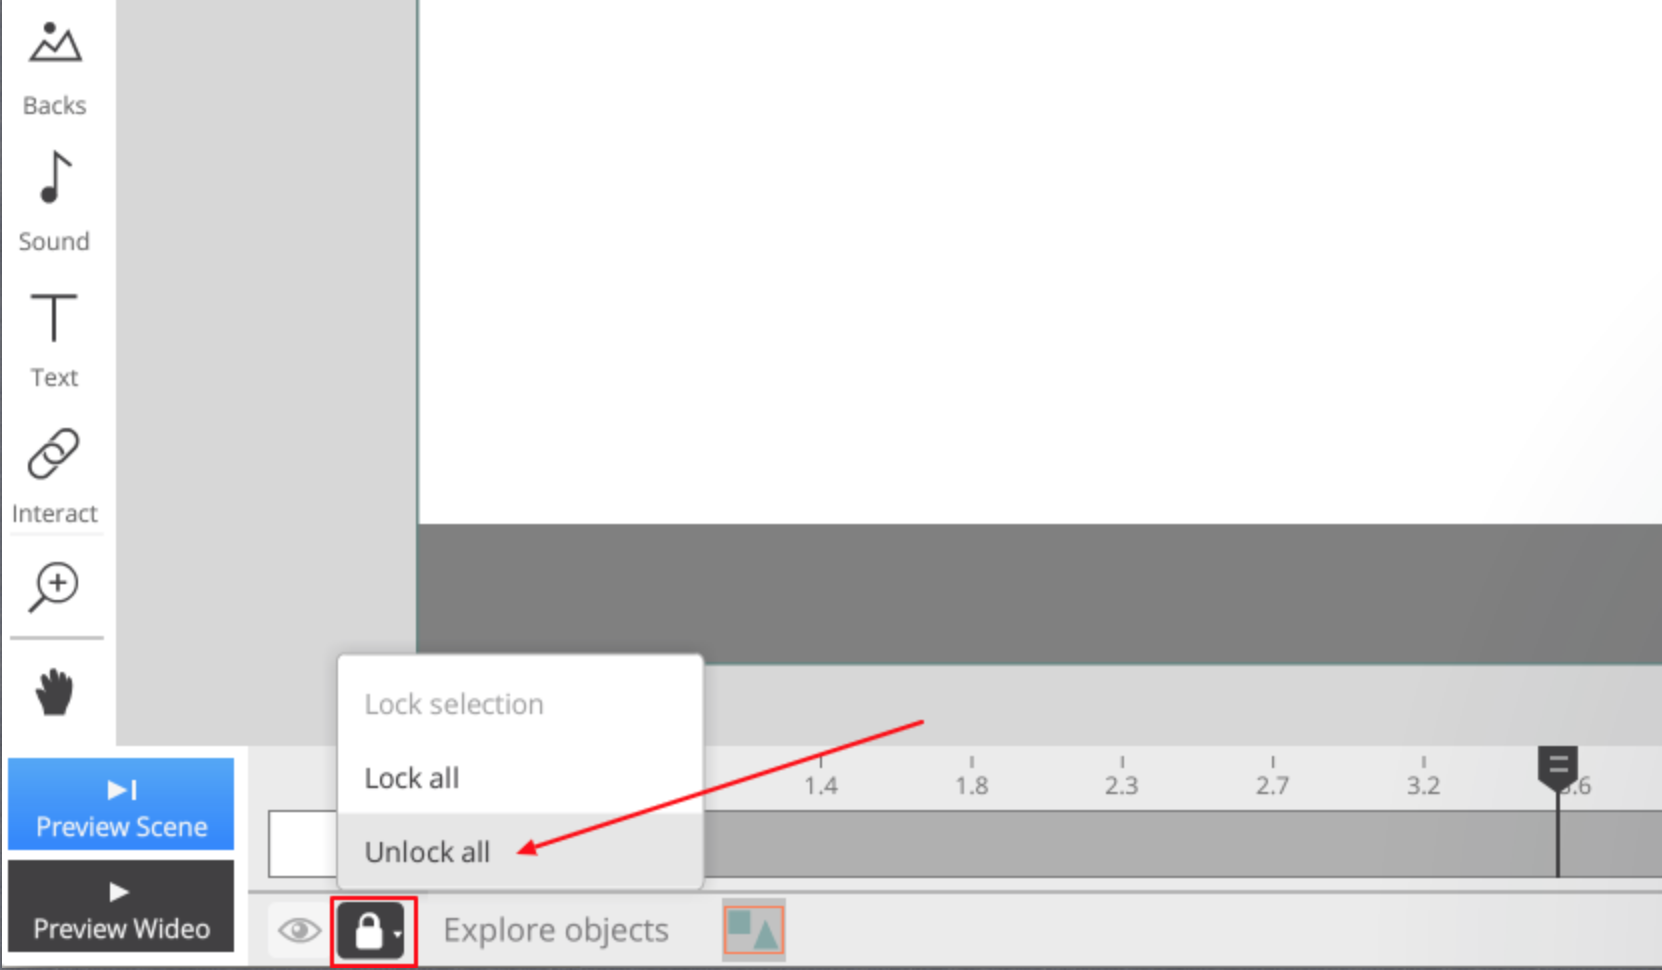
Just click the padlock button and select “unlock all” from the list menu.
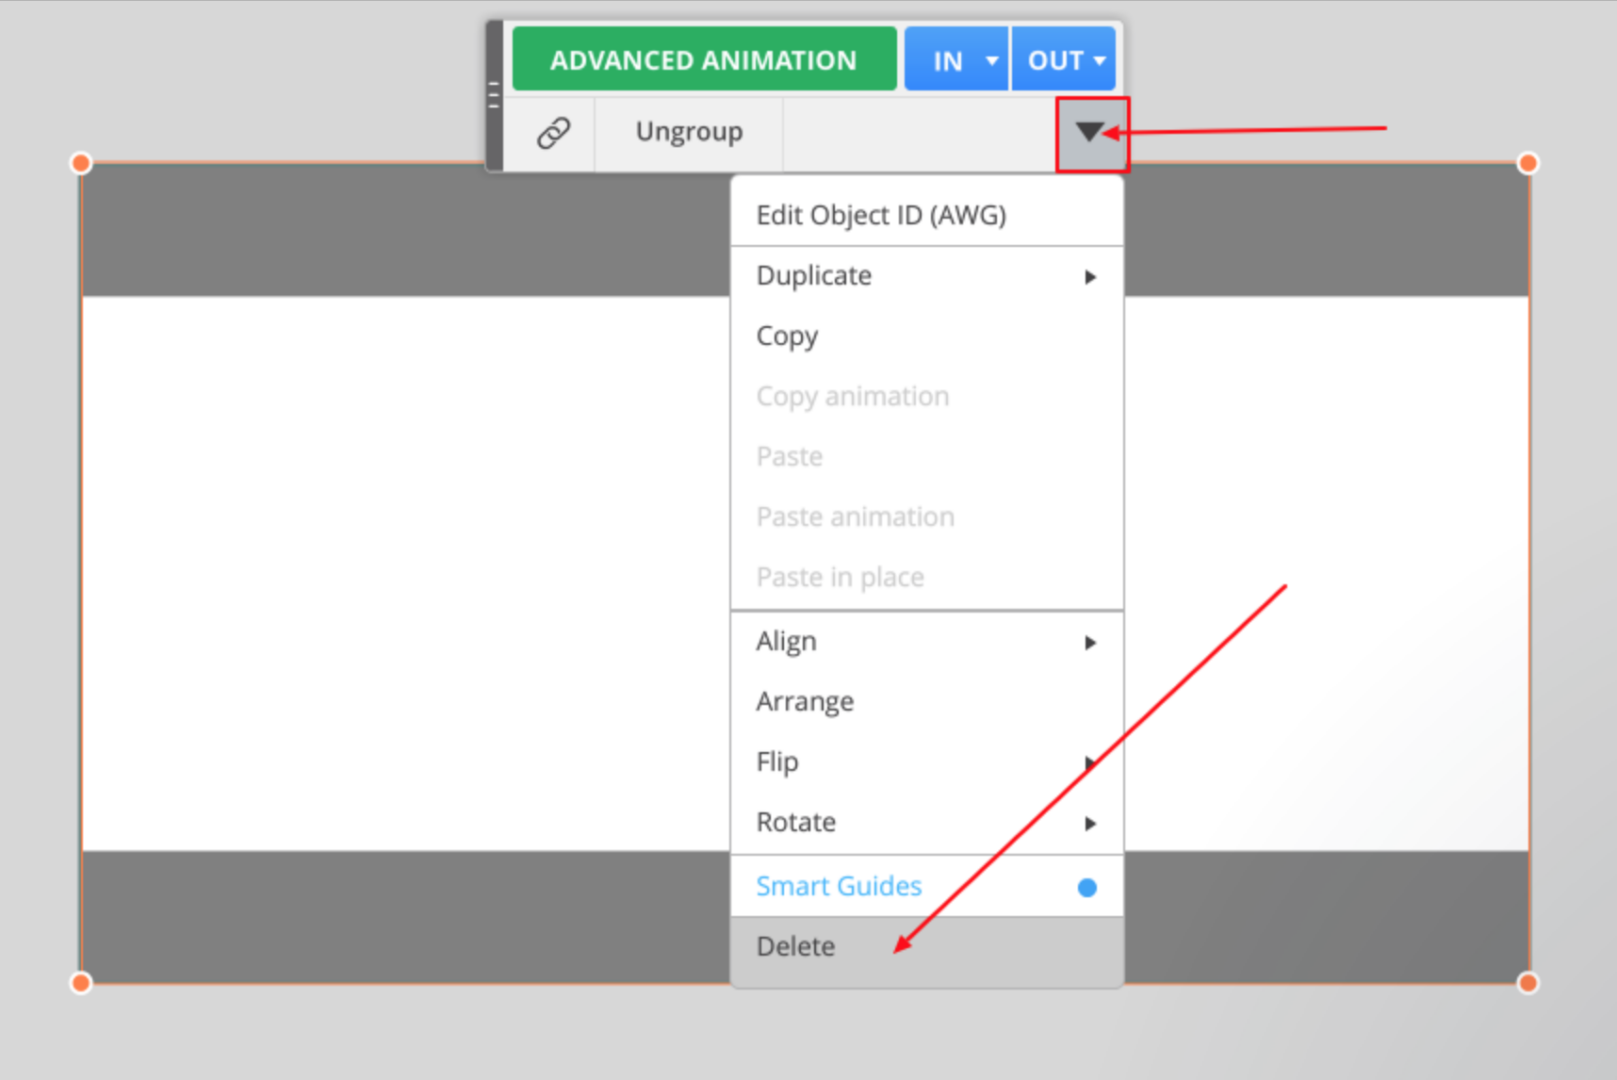
Select the object that contains the gray bars and delete it by clicking the “delete” button on the object drop down menu.
Or by simply hitting the “delete” or “backspace” key.
For more help about locking and unlocking objects click here.
If your video has more than 1 scene, you will need to repeat this step in every existing scene.
5 Shortcut for future videos
As you might know, in Wideo you can mark scenes as favorites so that you can export or reuse them in other videos.
It’s something like having a “bookmarks” scene library.
You can use this feature to always have the Facebook cover format scene template in your library.
The next time you want to create a video for a cover, just insert this scene template.
All you have to do is select the scene that we shared with you the first time you opened the video template (the empty scene with guides).
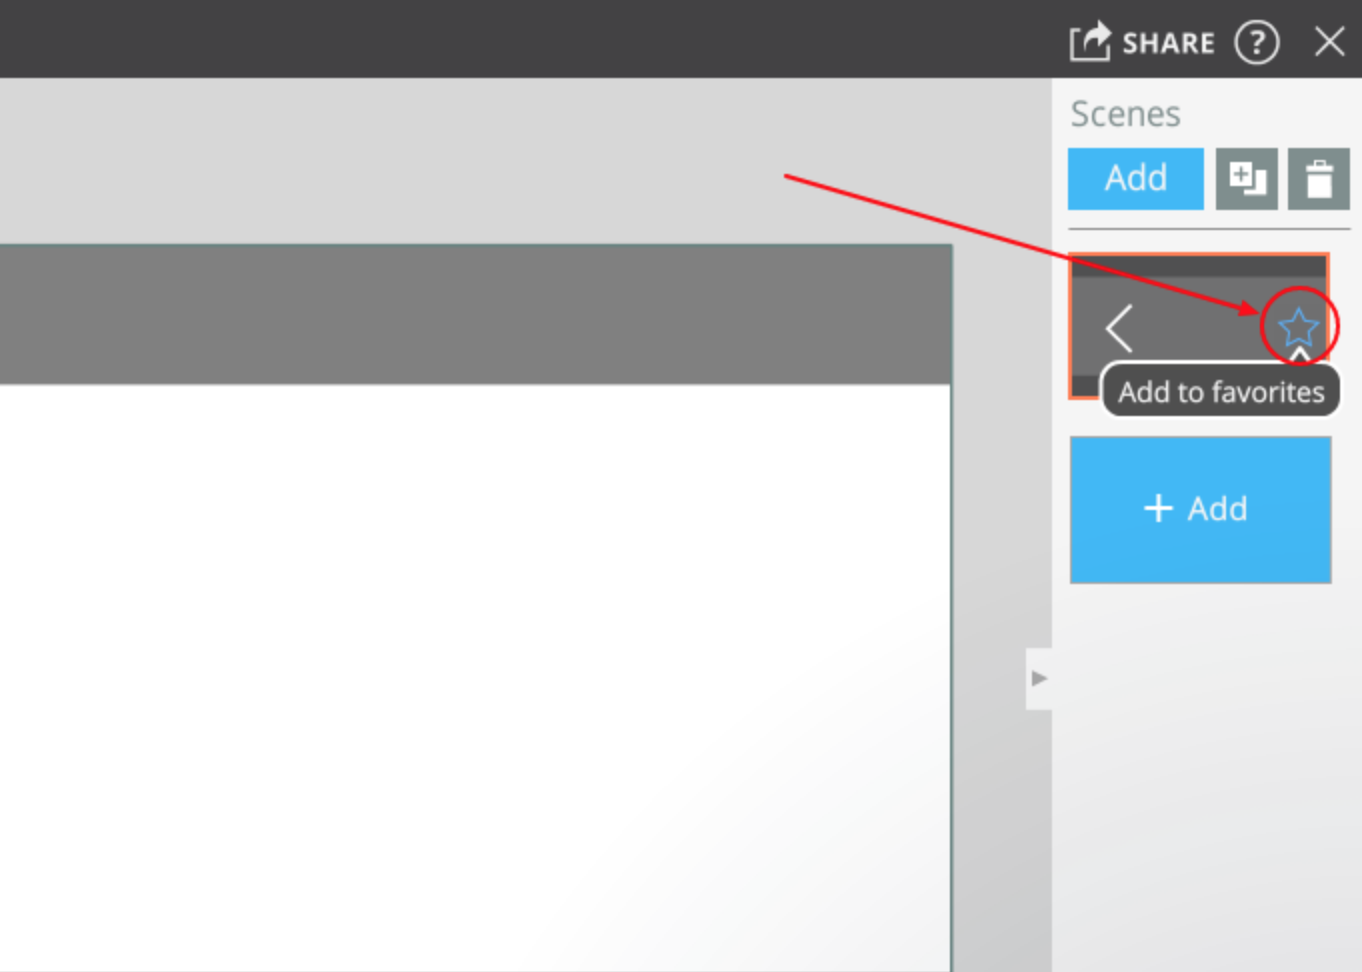
Then, just hover your mouse over the scene thumbnail and click the “star” button that appears to make it a favorite scene.
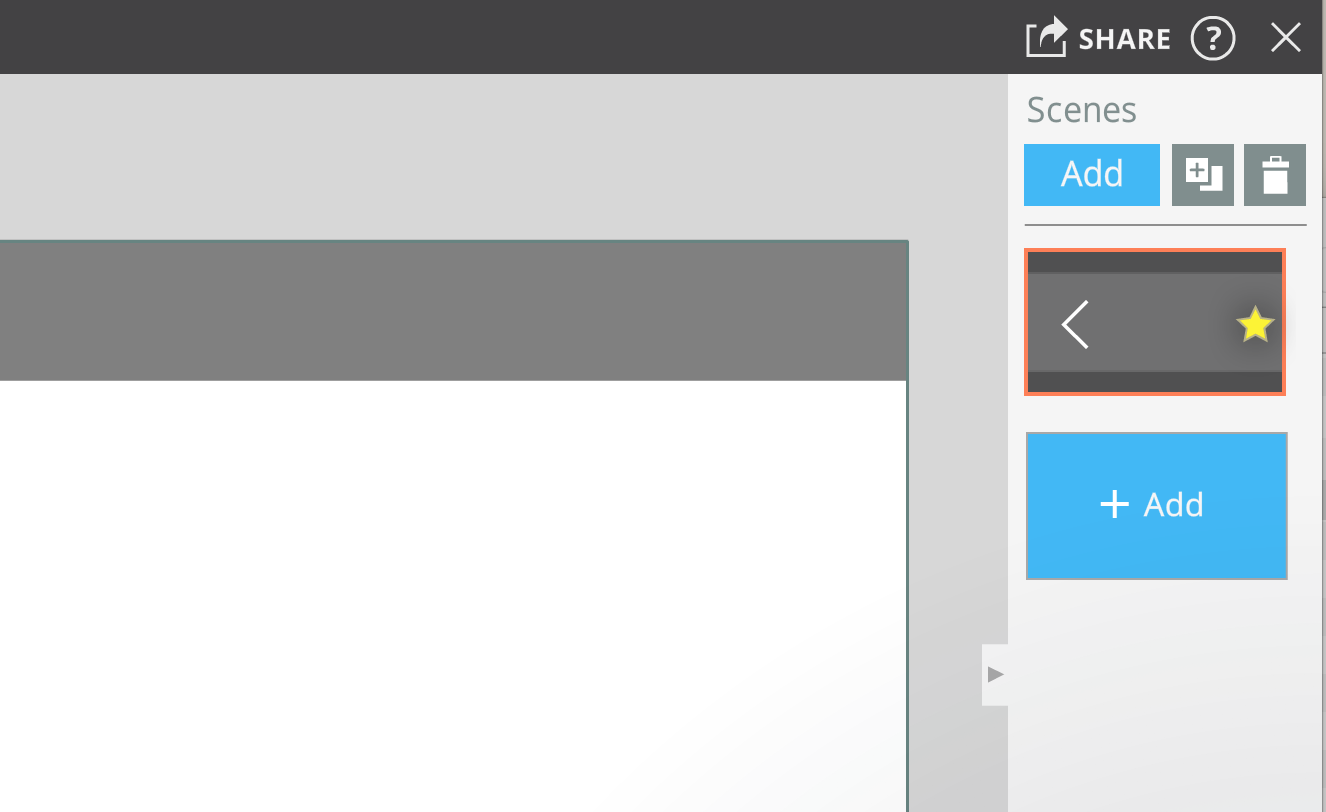
You will see the star is shown in yellow now, which means it has been stored in your favorite scenes library.
Now, no matter which video you are editing, if you go to insert a scene template this scene will appear under the favorite scenes tab (star icon).
All you have to do is to click the “add” button to create a new scene.
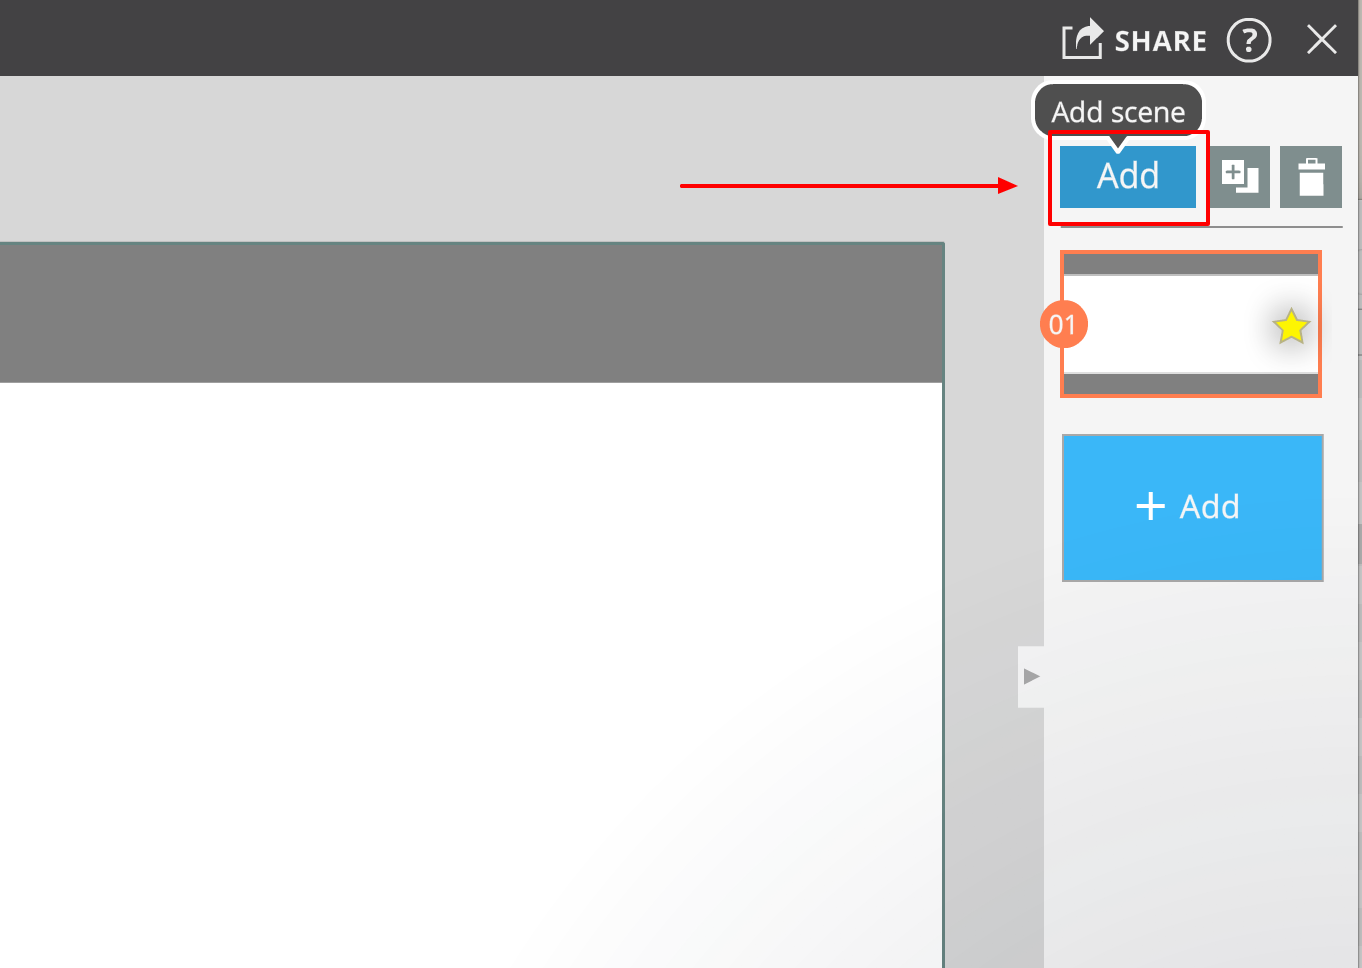
Then, select the “favorite scenes” tab (star icon).
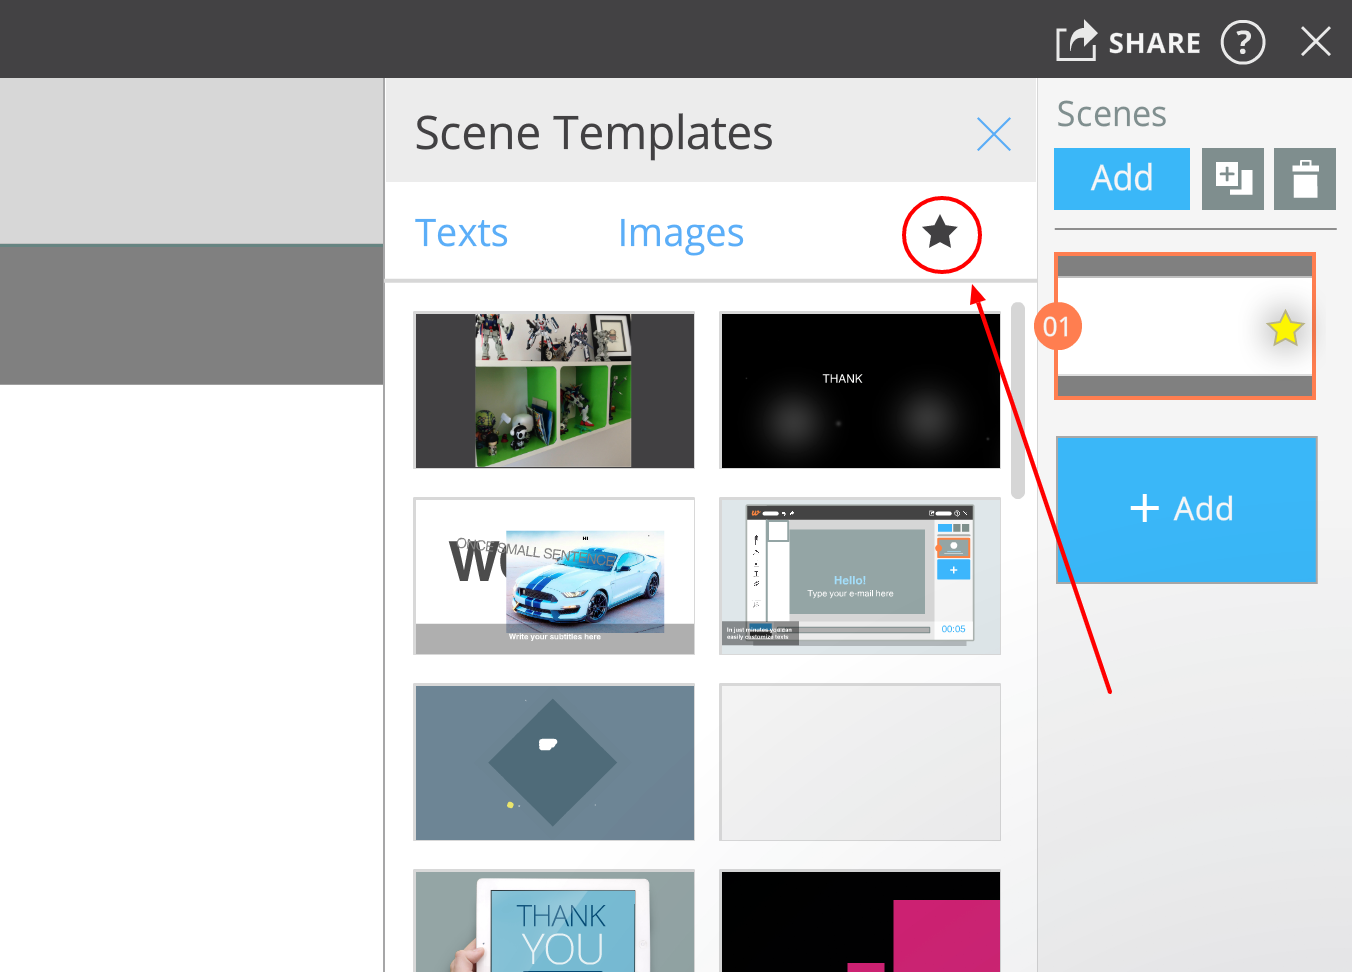
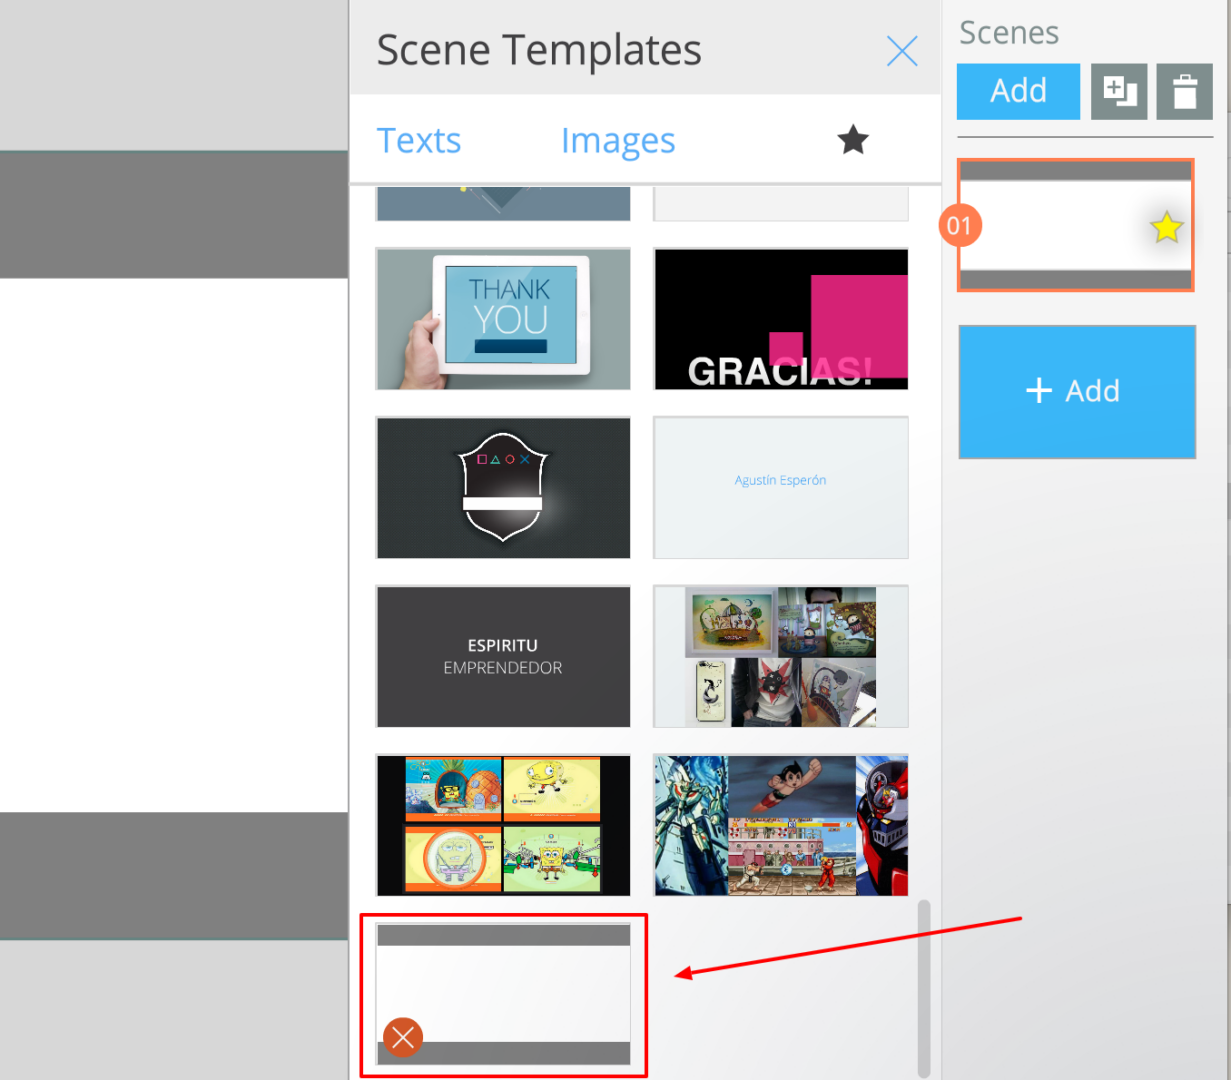
The new favorite scene will appear there (you’ll have to scroll down if you have a lot of saved scenes).
Click the scene and it will be inserted into your video.
If you’re creating a video from a template or an existing video
You may want to adapt a template or an existing video to Facebook cover format.
To do this, you can either insert the guides as a favorite scene (following step 5), or you can upload the guides PNG file to your video in order to use it as a reference.
1 Download the PNG file
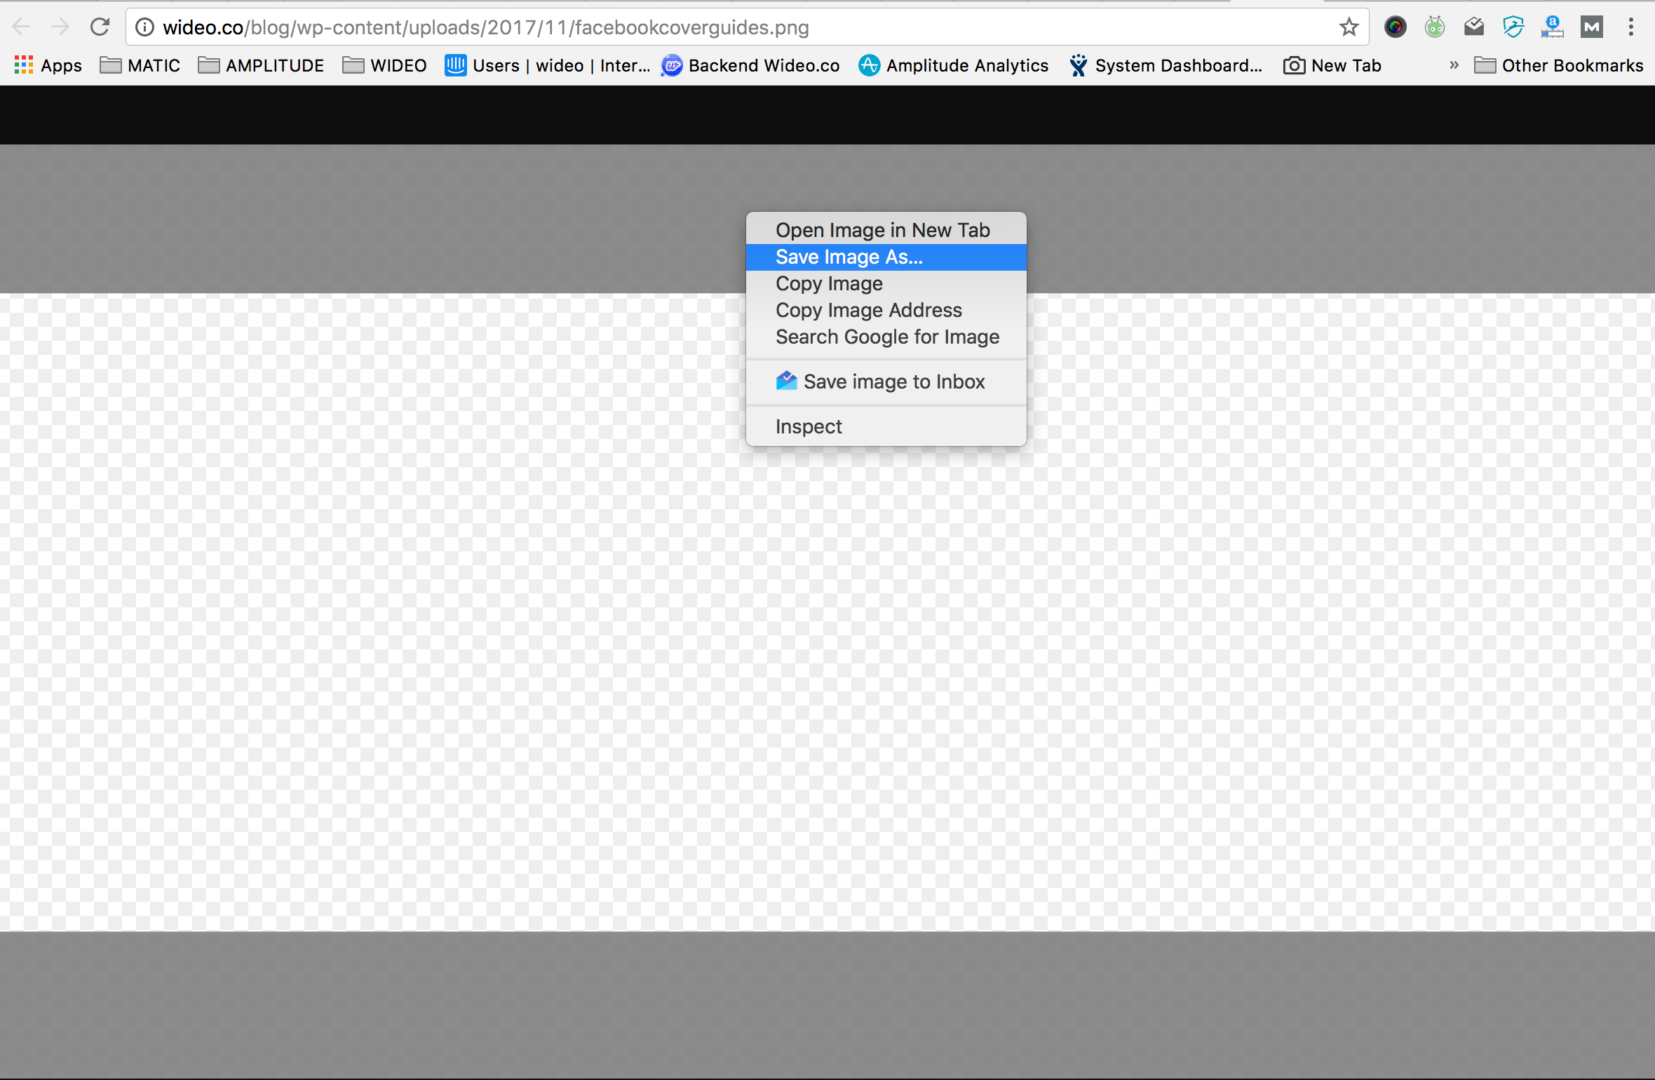
Click here to open the PNG file in your browser.
Then right click on it and select “Save Image As” to download the PNG file.
2 Upload the PNG image to your video
Once inside the video editor, click the “Images” button in the left toolbar, and click “Upload” in the images menu.
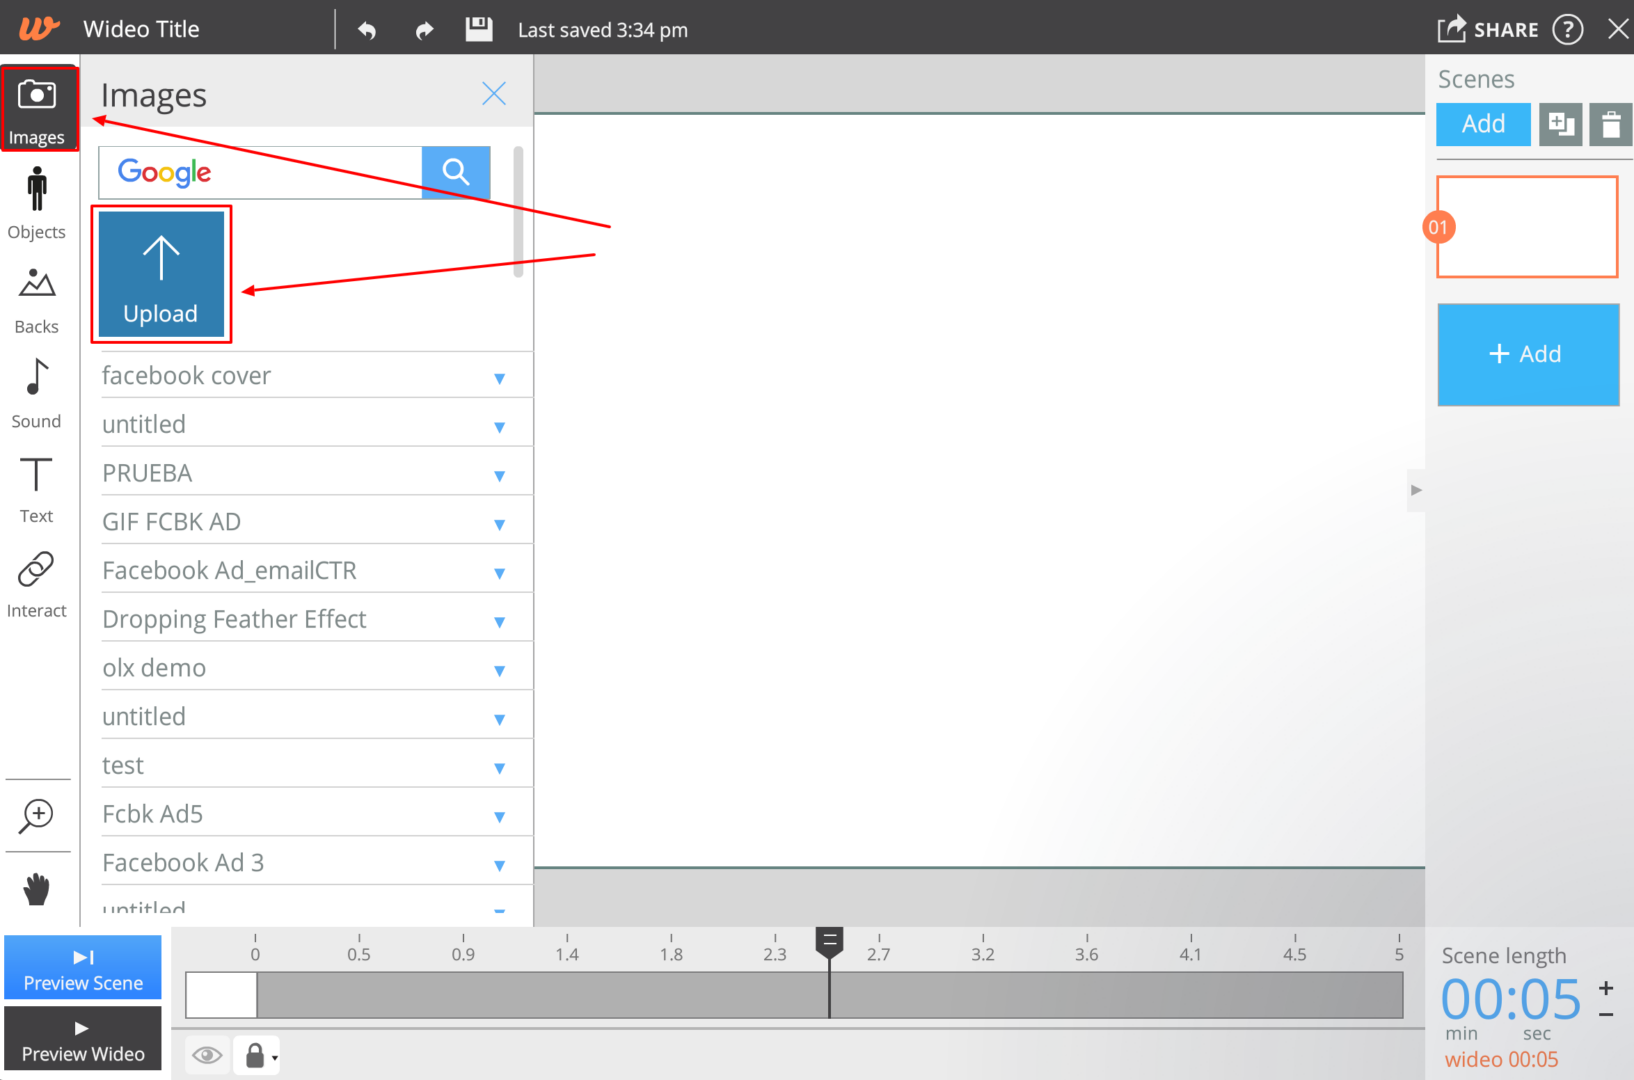
Now choose the PNG file you’ve previously downloaded to your computer and click “Open.”
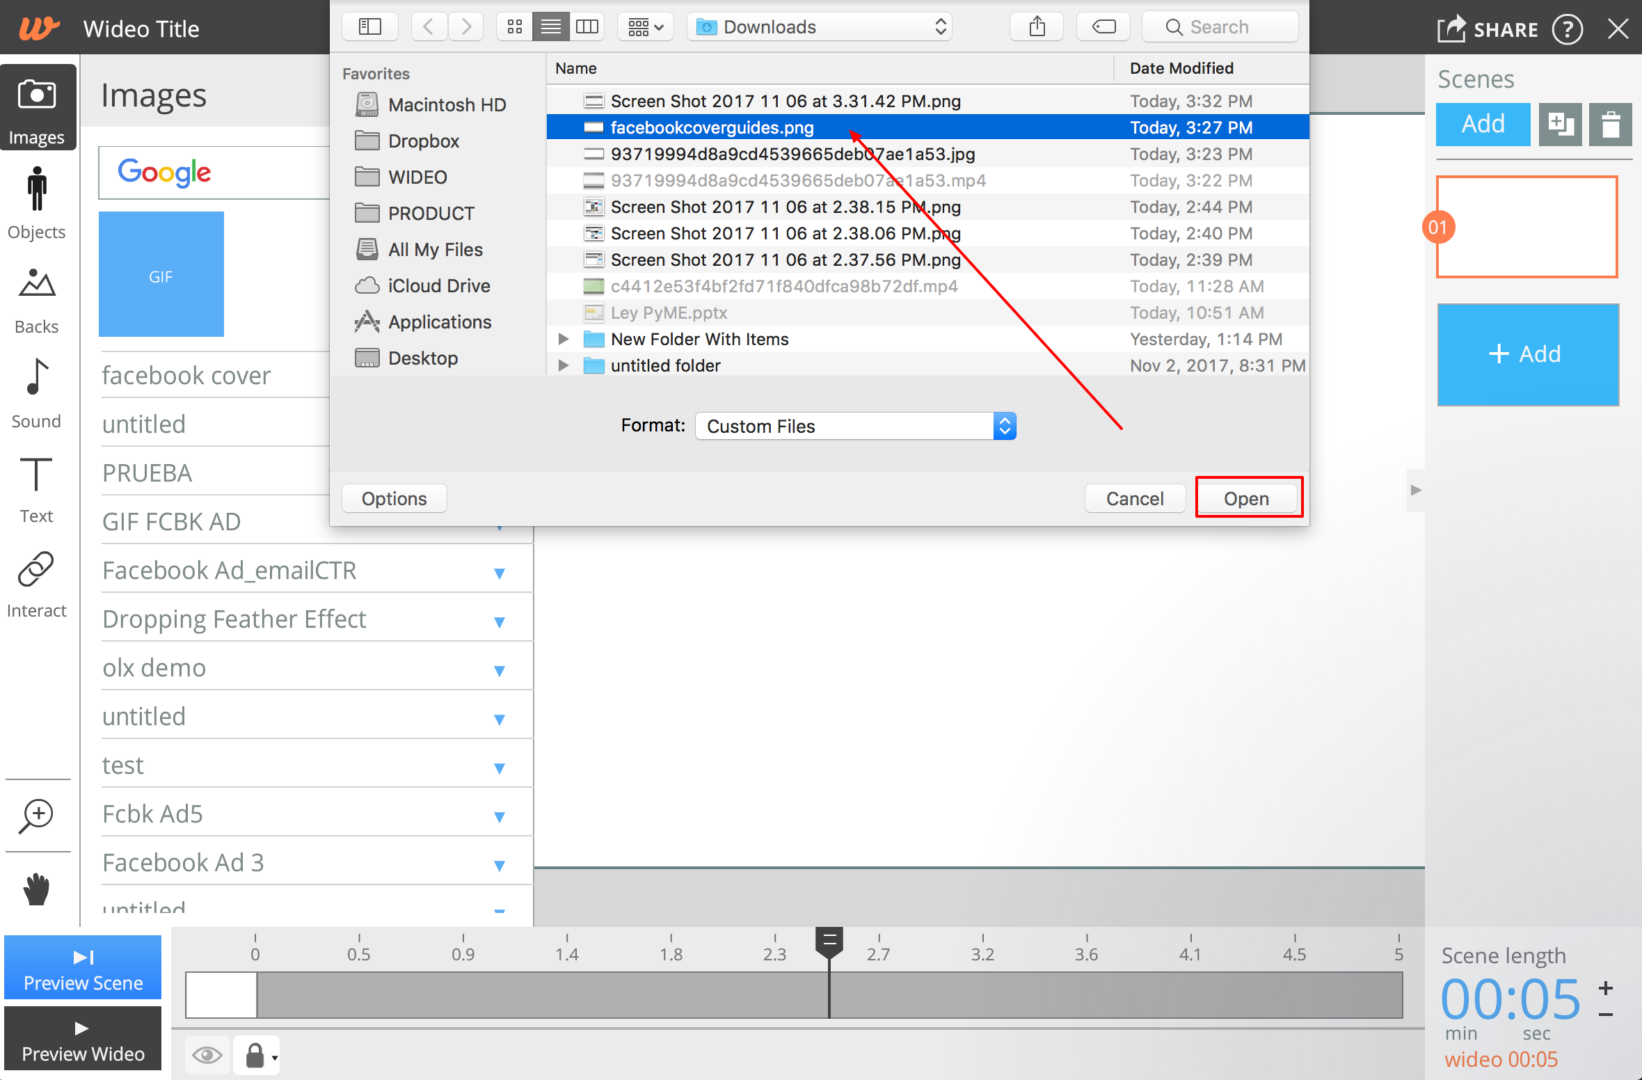
Done! You have placed the guides in your scene and you can start working.
Don’t forget to lock the PNG file so you can work comfortably.
Also, apply steps 2, 3 and 4.
Once your video is ready, download it and proceed to upload it as a Facebook cover on your fan page.
Read this article to find more help on how to use a video as a cover in Facebook.
I hope this helps you creating an optimized Facebook Cover Video.
Agus
Wideo Co-Founder & Head of UX/Design


